
How to prepare an olive cutting
How to prepare an olive cutting
As with many tree or herbaceous species, the olive tree can also be propagated by cuttings.
We remember, in this regard, that cutting is the fragment of a plant specially cut and placed in the ground or in water to regenerate the missing parts, thus giving life to a new specimen.
Most of the time, however, it is a branch destined to take root.
The olive tree can also be propagated by cuttings, knowing that the offspring will have the same genetic characteristics as the mother plant. For this reason, if you want to reproduce a feature or a series of features, the use of propagation by cutting easily solves this aspect.
Furthermore, this technique allows us not to have to turn to nurseries (which adopt it to a large extent) and to obtain from a single plant a large number of new plants at almost zero cost.
Furthermore, the propagation by cuttings allows to obtain adult plants in shorter times (not having to go through the longer phase of germination) which then need to be grafted with the variety of olive trees that you want to produce.
The disadvantages of propagation by cuttings are instead those which, in the case of planting many plants, obtain excessively homogeneous populations with greater ecological susceptibility (parasitic attacks, lower biodiversity, etc.).
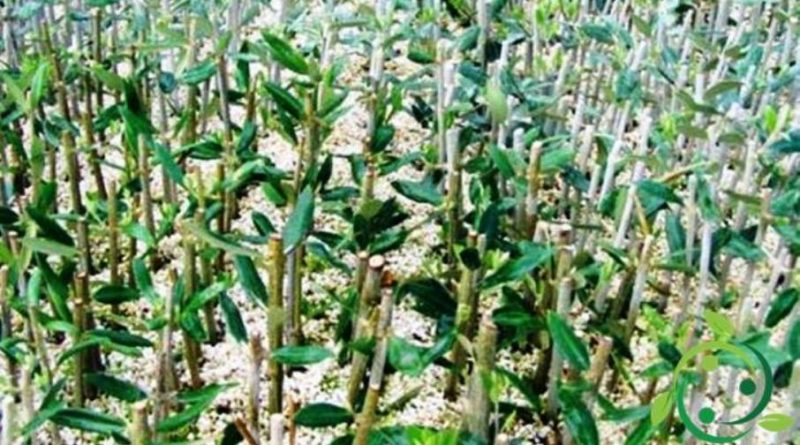
Moving on to the more practical part, it should be remembered that to create an olive cutting it is necessary to let the winter period pass, so that the lignification is optimal.
At this point it is appropriate to identify a robust olive branch, at least two years old on which some buds are present.
Once the suitable branch has been identified, with very sharp and disinfected shears, a part (which will give rise to the cutting) of the branch at the base is cut, taking a piece of about twenty centimeters.
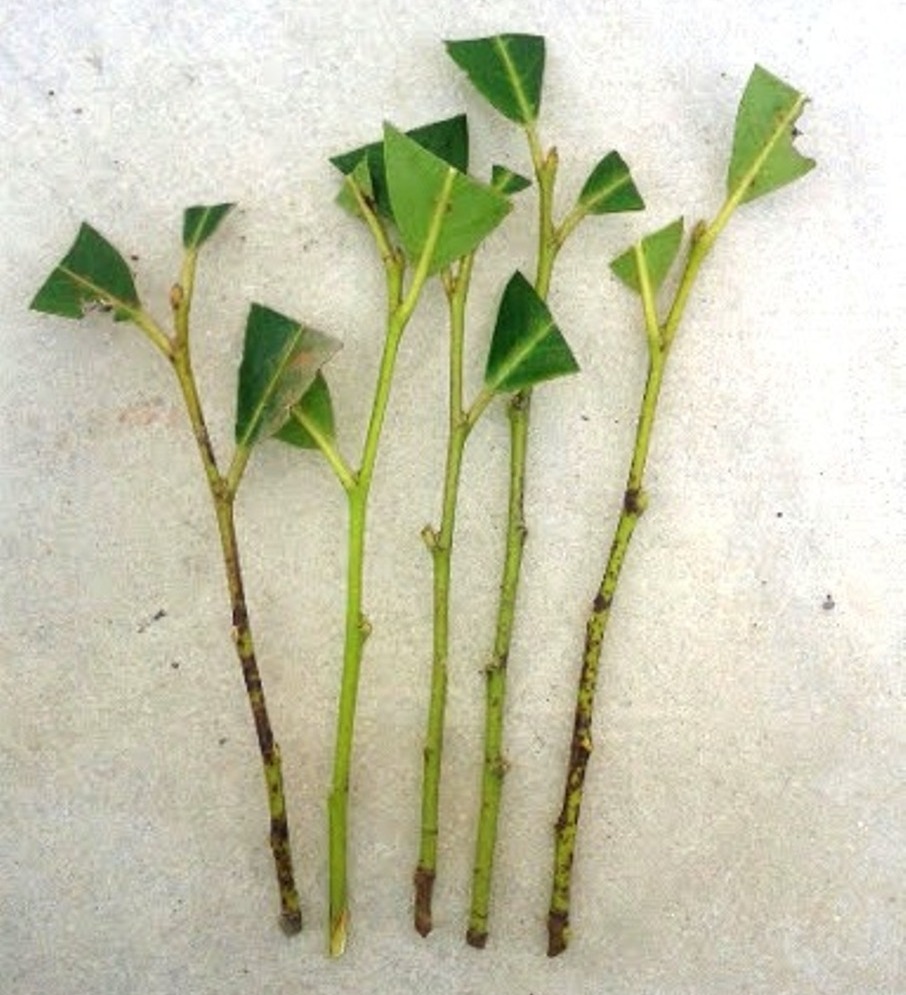
At this point, before proceeding with the insertion into the soil, it is advisable to keep the twig immersed in water at room temperature for at least 12 hours and remove all the leaves, or leaving only the initial part at the limit.
The branch is then treated with a hormonal product, which can be prepared at home or on the farm, and is then set to take root by inserting it in the soil so that only the fourth part of its length remains above ground (where the new leaves will develop).
In the absence of a hormonal substance we can immerse the branch in a slurry of water, earth and manure.
The insertion operation of this must be done in pots even of not large dimensions and the same must be placed in sheltered and shaded areas and the external end must be sealed with a vegetable mastic that prevents the entry of parasites.
The pots, about 20 cm in diameter, must be filled with sand-based molds (75%) and peat (25%). A flat stone or a piece of earthenware should be placed on the bottom of the vase, in correspondence with the draining hole.
The cuttings thus treated can emit new shoots by summer or rest until the following season. To be sure if the cutting takes root and leaves leaflets it is known that as long as the branch is light gray in color it is able to emit shoots and roots.
Once these operations are carried out, it is good to keep the soil constantly humid but without ever creating stagnations, in an average humid environment, and with good brightness but without direct sunlight until the leaves are perfectly formed and the new seedling starts perfectly in the photo synthesize.
For the transplant operation in the open ground it is advisable to let the summer pass and carry it out in the autumn now well past.